
Provisioning from Entra ID
Provisioning is configured on an application in your own directory. The Scalepoint application you may already have installed for single sign-on is not used for provisioning, so create a separate one as described below.
Create the application
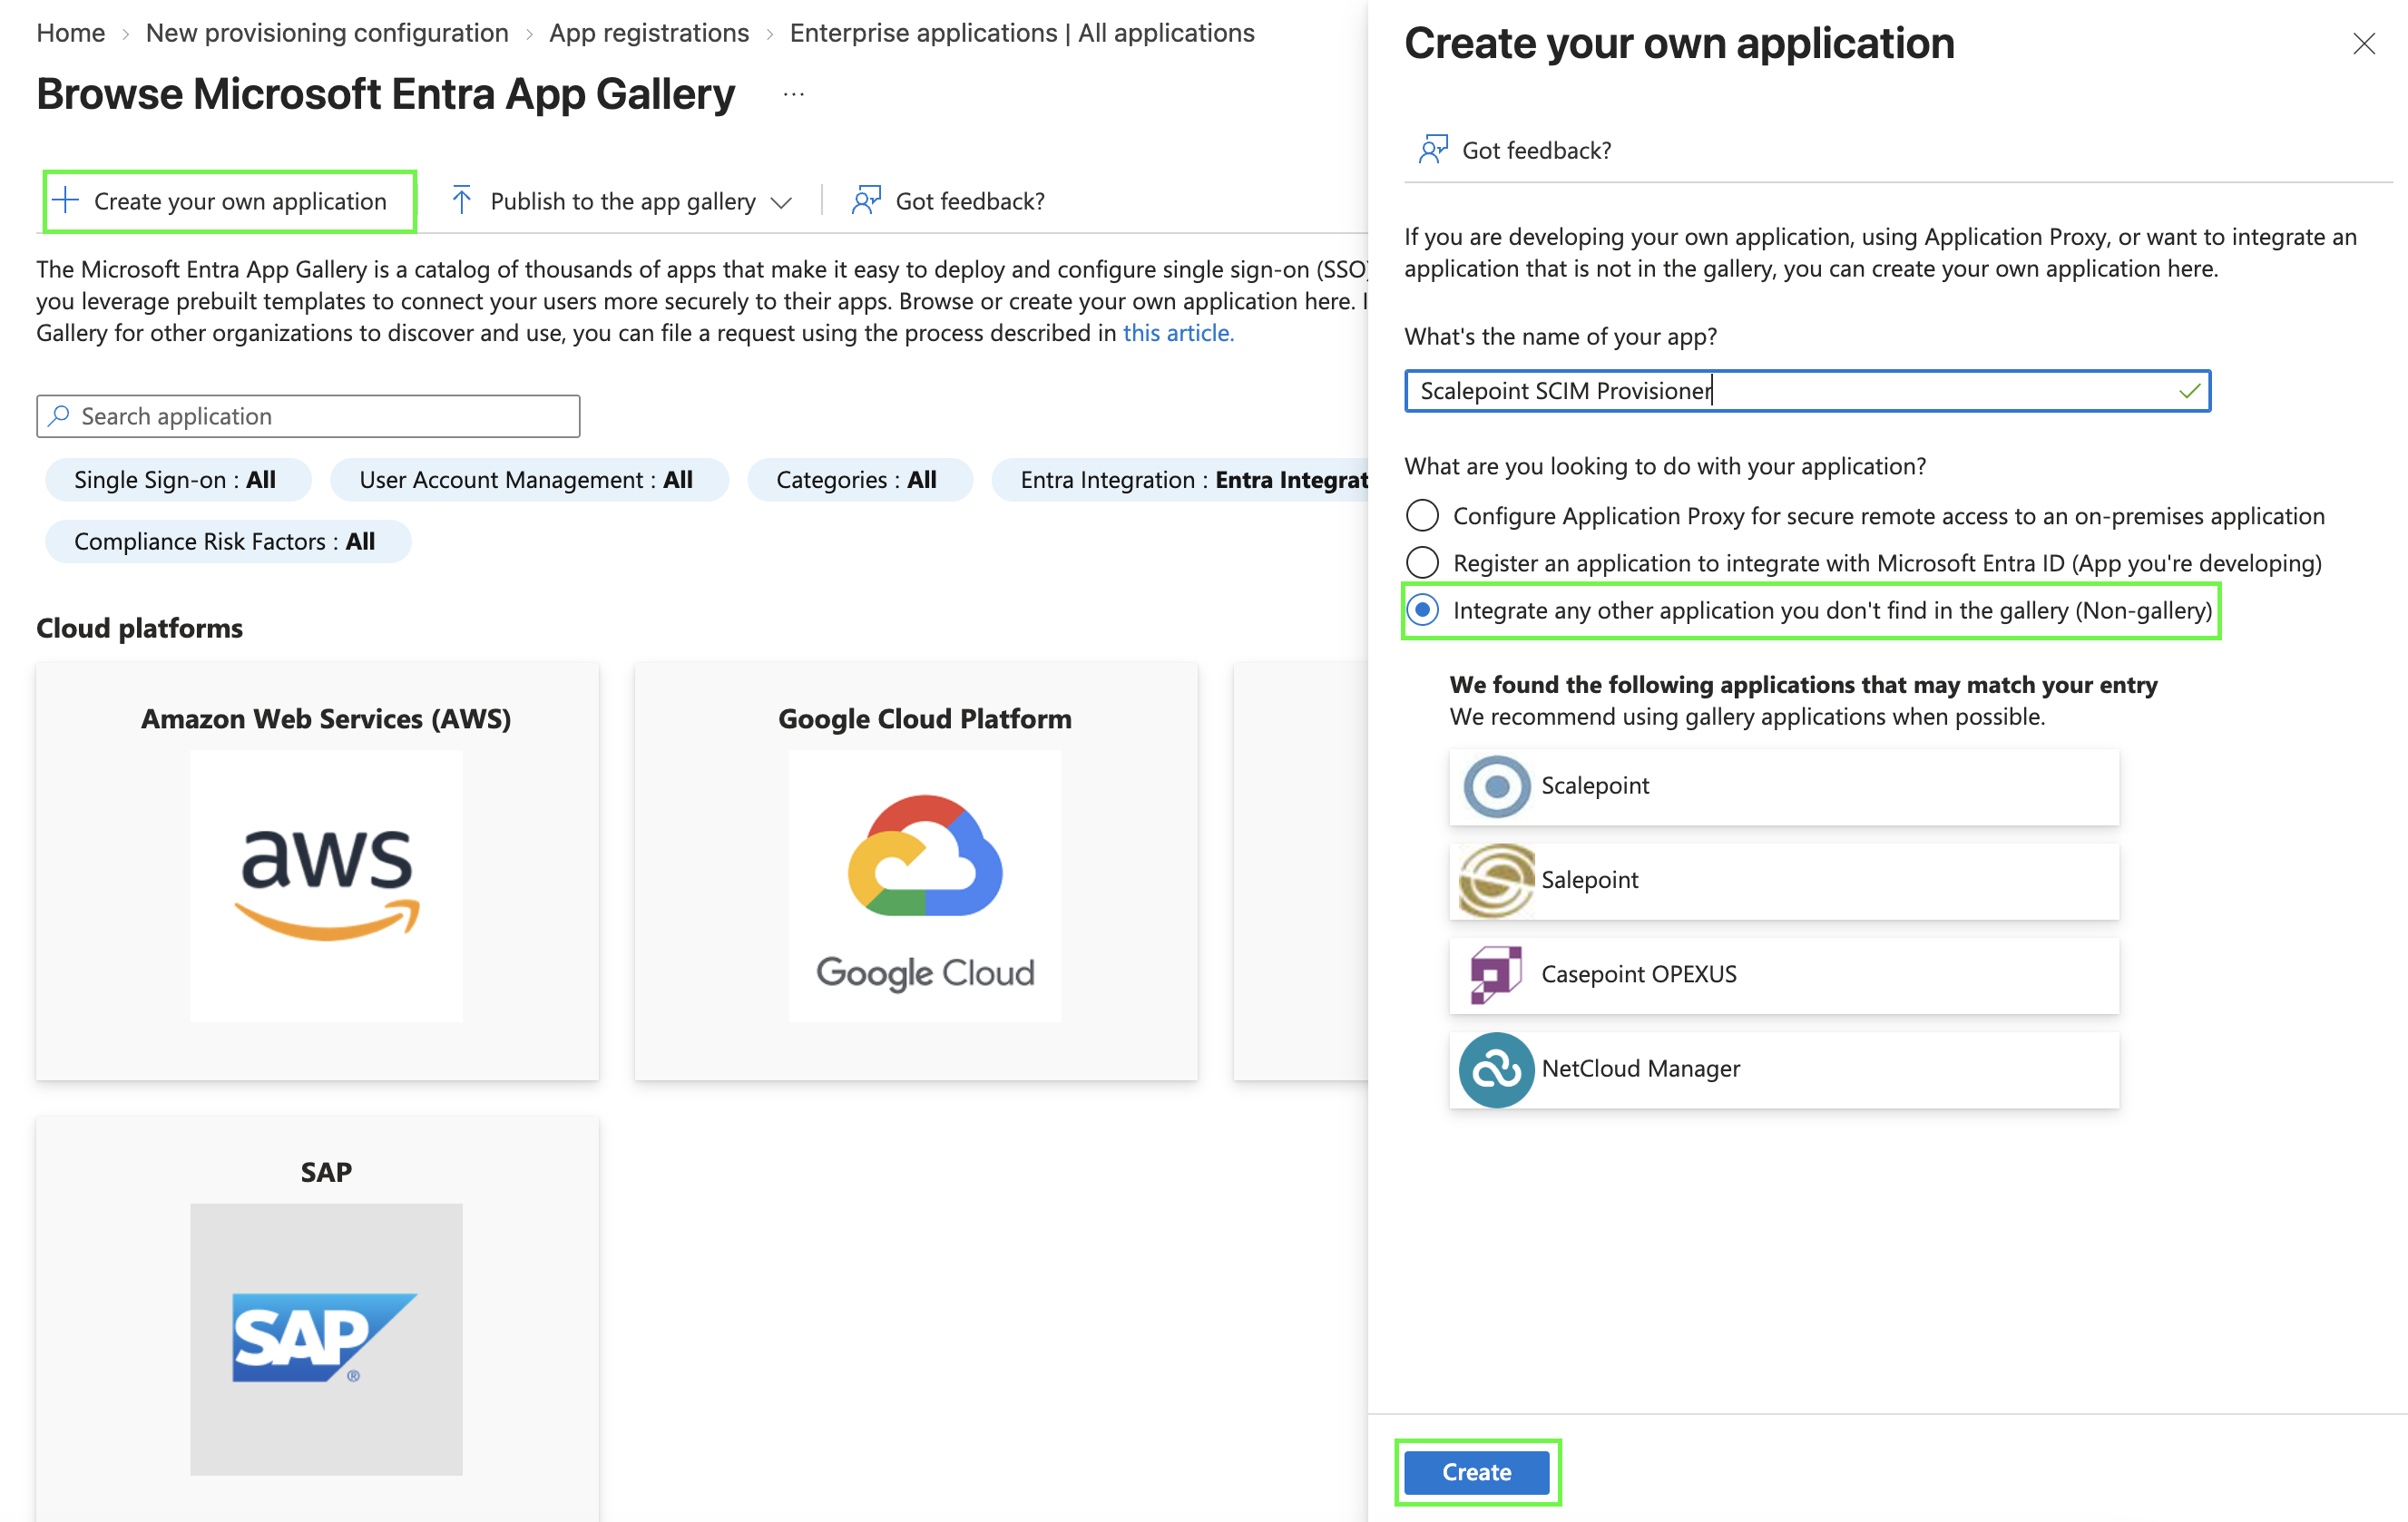
- In the Microsoft Entra admin center, go to Enterprise applications and select New application.
- Select Create your own application.
- Name it, for example,
Scalepoint SCIM Provisioner. - Select Integrate any other application you don't find in the gallery (Non-gallery). Entra may suggest gallery applications whose names resemble what you typed; keep the non-gallery option selected.
- Select Create.
Configure provisioning
-
Open the new application, select Provisioning, and start a new provisioning configuration. The configuration is automatic; there is no mode to choose.
-
Under Admin credentials, choose OAuth2 client credentials grant as the authentication method.
-
Fill in the remaining fields:
Field Value Tenant URL the SCIM base URL Scalepoint gave you OAuth token endpoint the token endpoint for the same environment, listed under Authentication Client identifier your client ID Client secret your client secret -
Select Test connection. Entra requests a token and makes a test call. Create stays disabled until this succeeds, so resolve any error here.
-
Select Create.
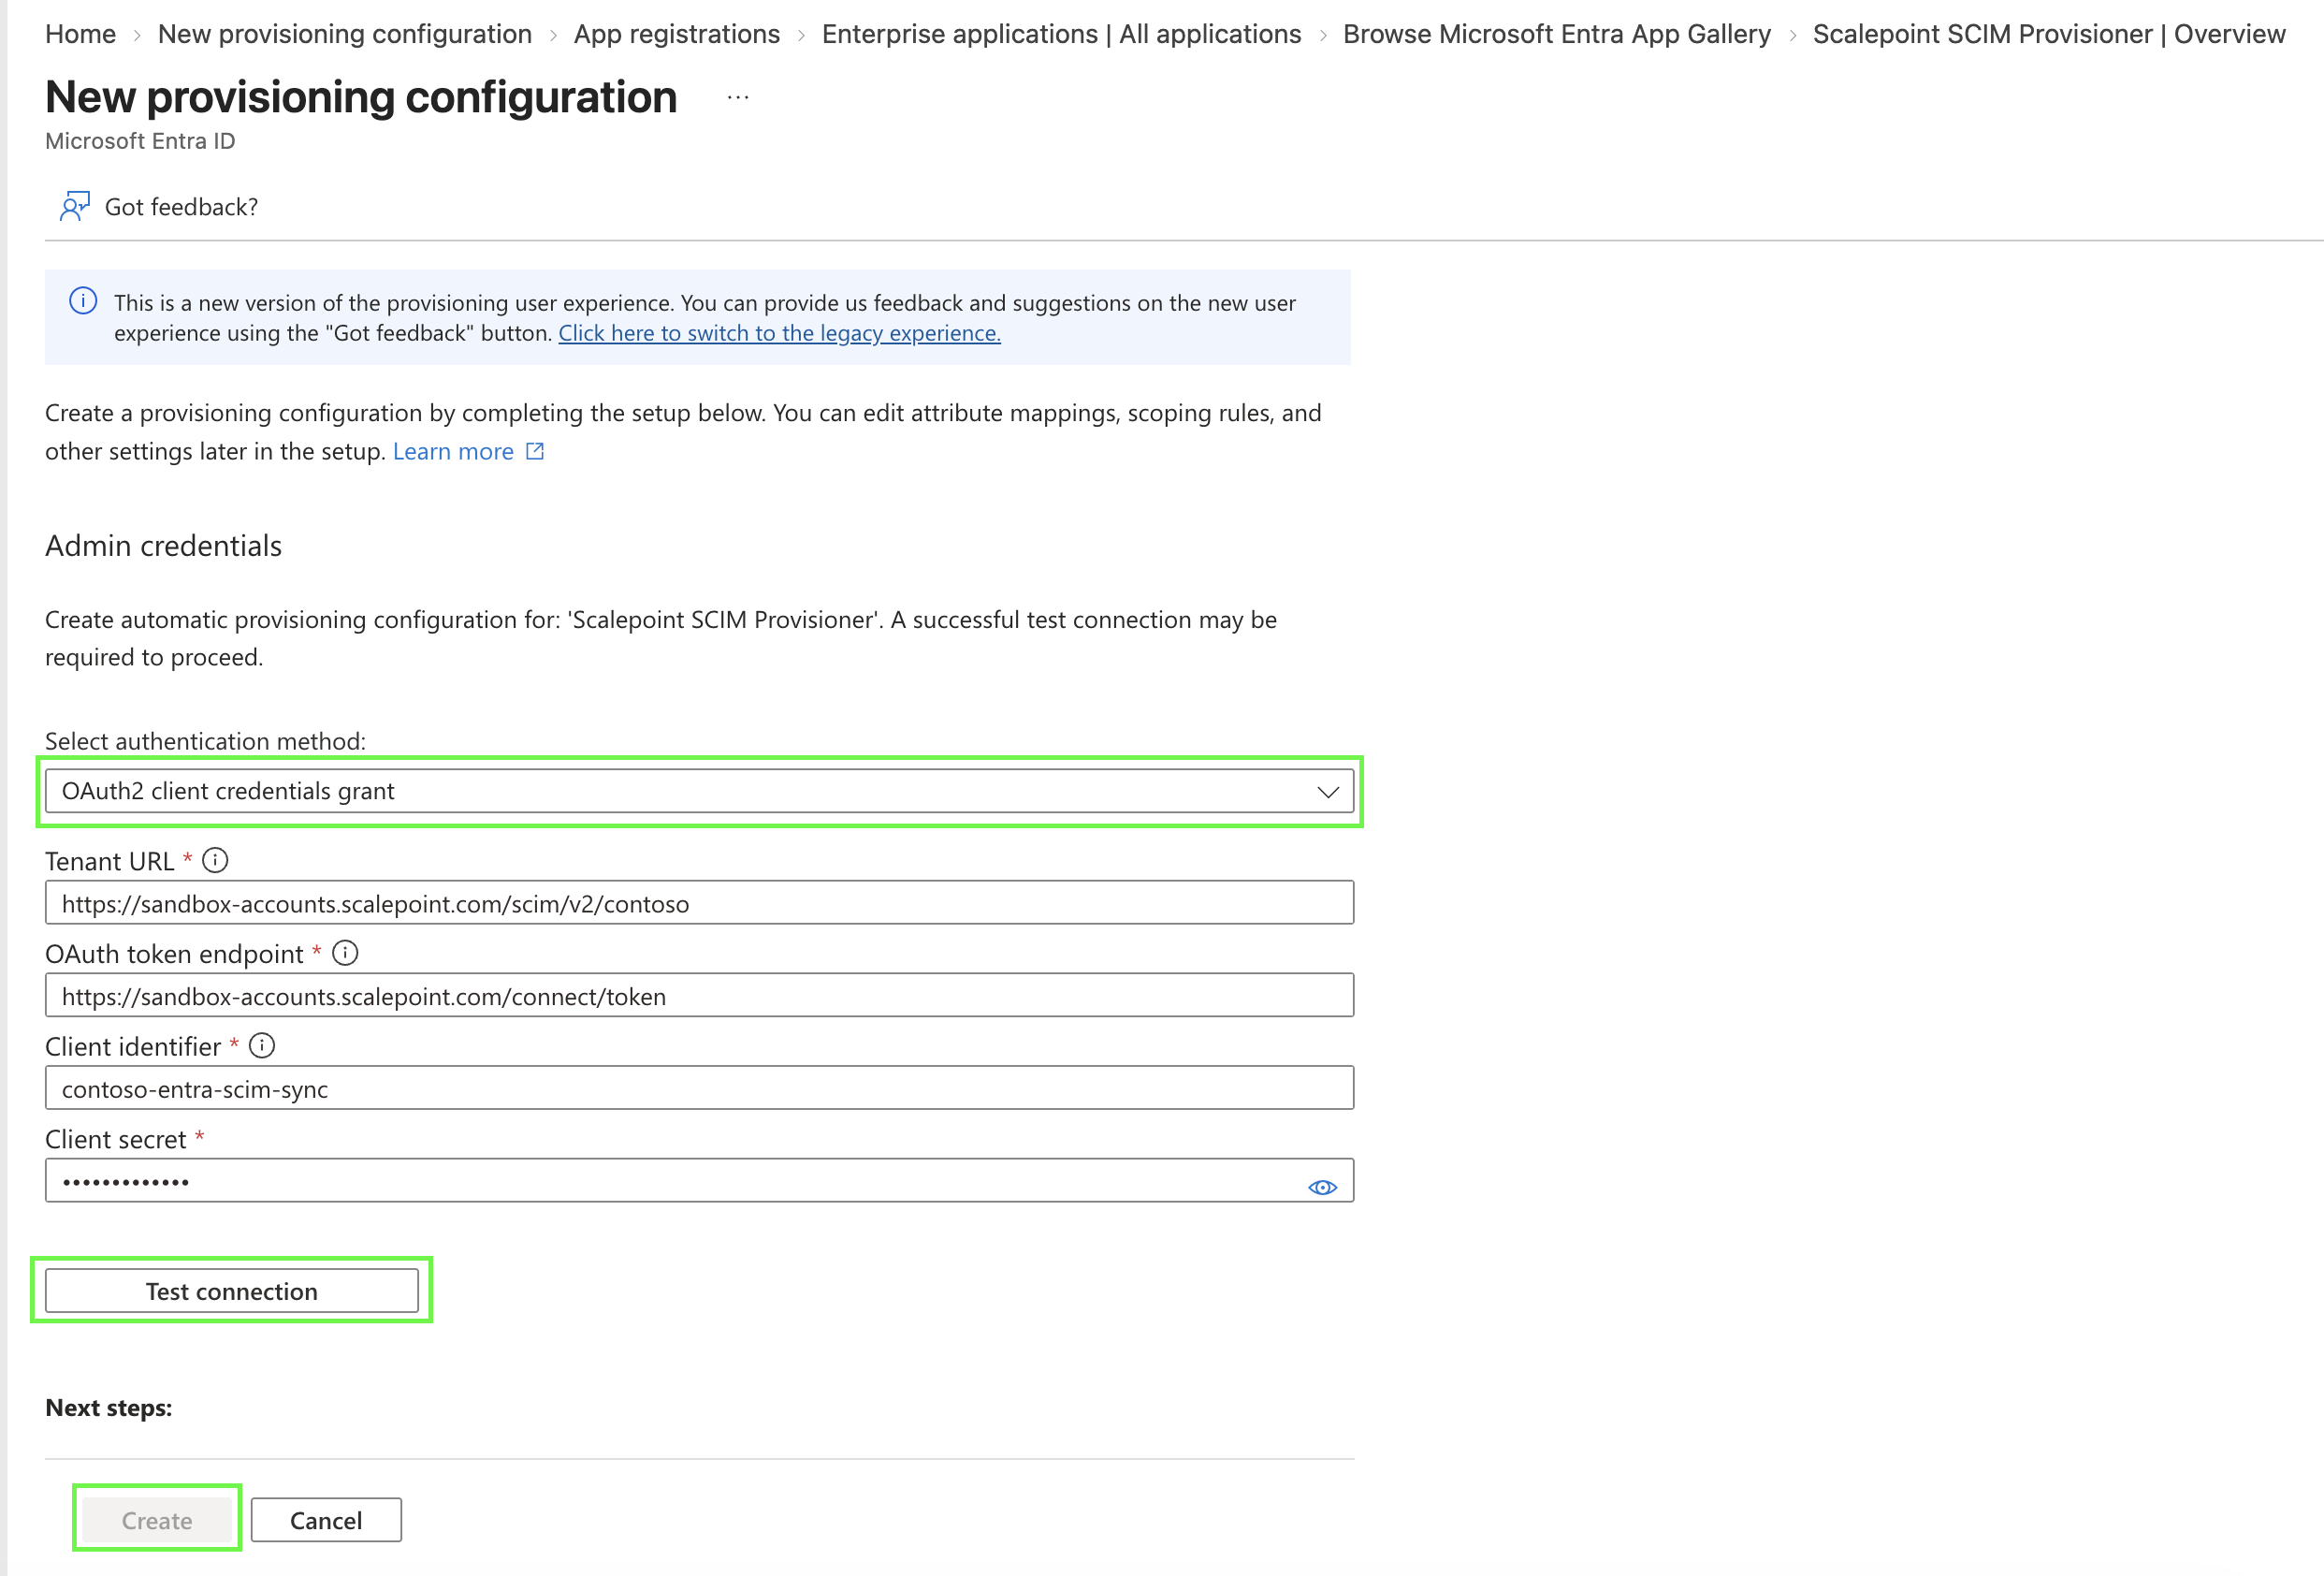
Use the sandbox values while you are testing, as in the screenshot above, and repeat the setup with the production values once the integration works.
You are taken to the configuration details page afterwards, where the remaining settings live.
Map attributes
You do not need to configure attribute mappings. Entra's defaults for a non-gallery SCIM application already send what Scalepoint consumes, and the attributes Scalepoint does not use are ignored.
If you do open Provisioning > Mappings, leave externalId mapped to the Entra objectId. The object ID is the only Entra identifier that survives a rename. If externalId points at userPrincipalName or a mail attribute instead, renaming the user in Entra makes Scalepoint treat them as a different person, and you get a duplicate account rather than an update.
See Attribute mapping for what Scalepoint does with each attribute it receives.
Choose what is provisioned
Under Settings, set Scope to Sync only assigned users and groups, then assign users and groups on the application's Users and groups tab.
Three things are worth planning around:
- A group must be assigned to the application before its membership is visible to Scalepoint. Assigning a user does not implicitly assign their groups.
- Nested group membership is not provisioned. If a user belongs to a group only through another group, assign the inner group as well, or the membership does not reach Scalepoint.
- Assign only the groups Scalepoint needs. Large numbers of assigned groups make each synchronization cycle slower.
Start provisioning
On the configuration's overview, select Start provisioning. The first cycle processes everyone in scope and can take some time; later cycles are incremental and run roughly every 40 minutes.
Monitor progress under Provisioning logs.
Last updated on